Configuring Components in .NET: Do it the Microsoft way
Introduction
In the world of .NET development, configuring components is a crucial aspect of creating applications. Most .Net developers are probably familiar with the IHostBuilder to configure your application and request pipeline. In this blog post, we will delve into the IHostBuilder, understand how it relies on Action<T> for configuring components, and learn how you can implement a similar approach to build components that are very easy to configure.
Understanding IHostBuilder
At its core, IHostBuilder is a key element in ASP.NET Core applications. It is used to configure the application and request pipeline, allowing developers to customize how requests are processed. One of the notable features of IHostBuilder is its reliance on the Action<T> delegate. If you look at the documentation you can see that this Action<T> is heavily used.
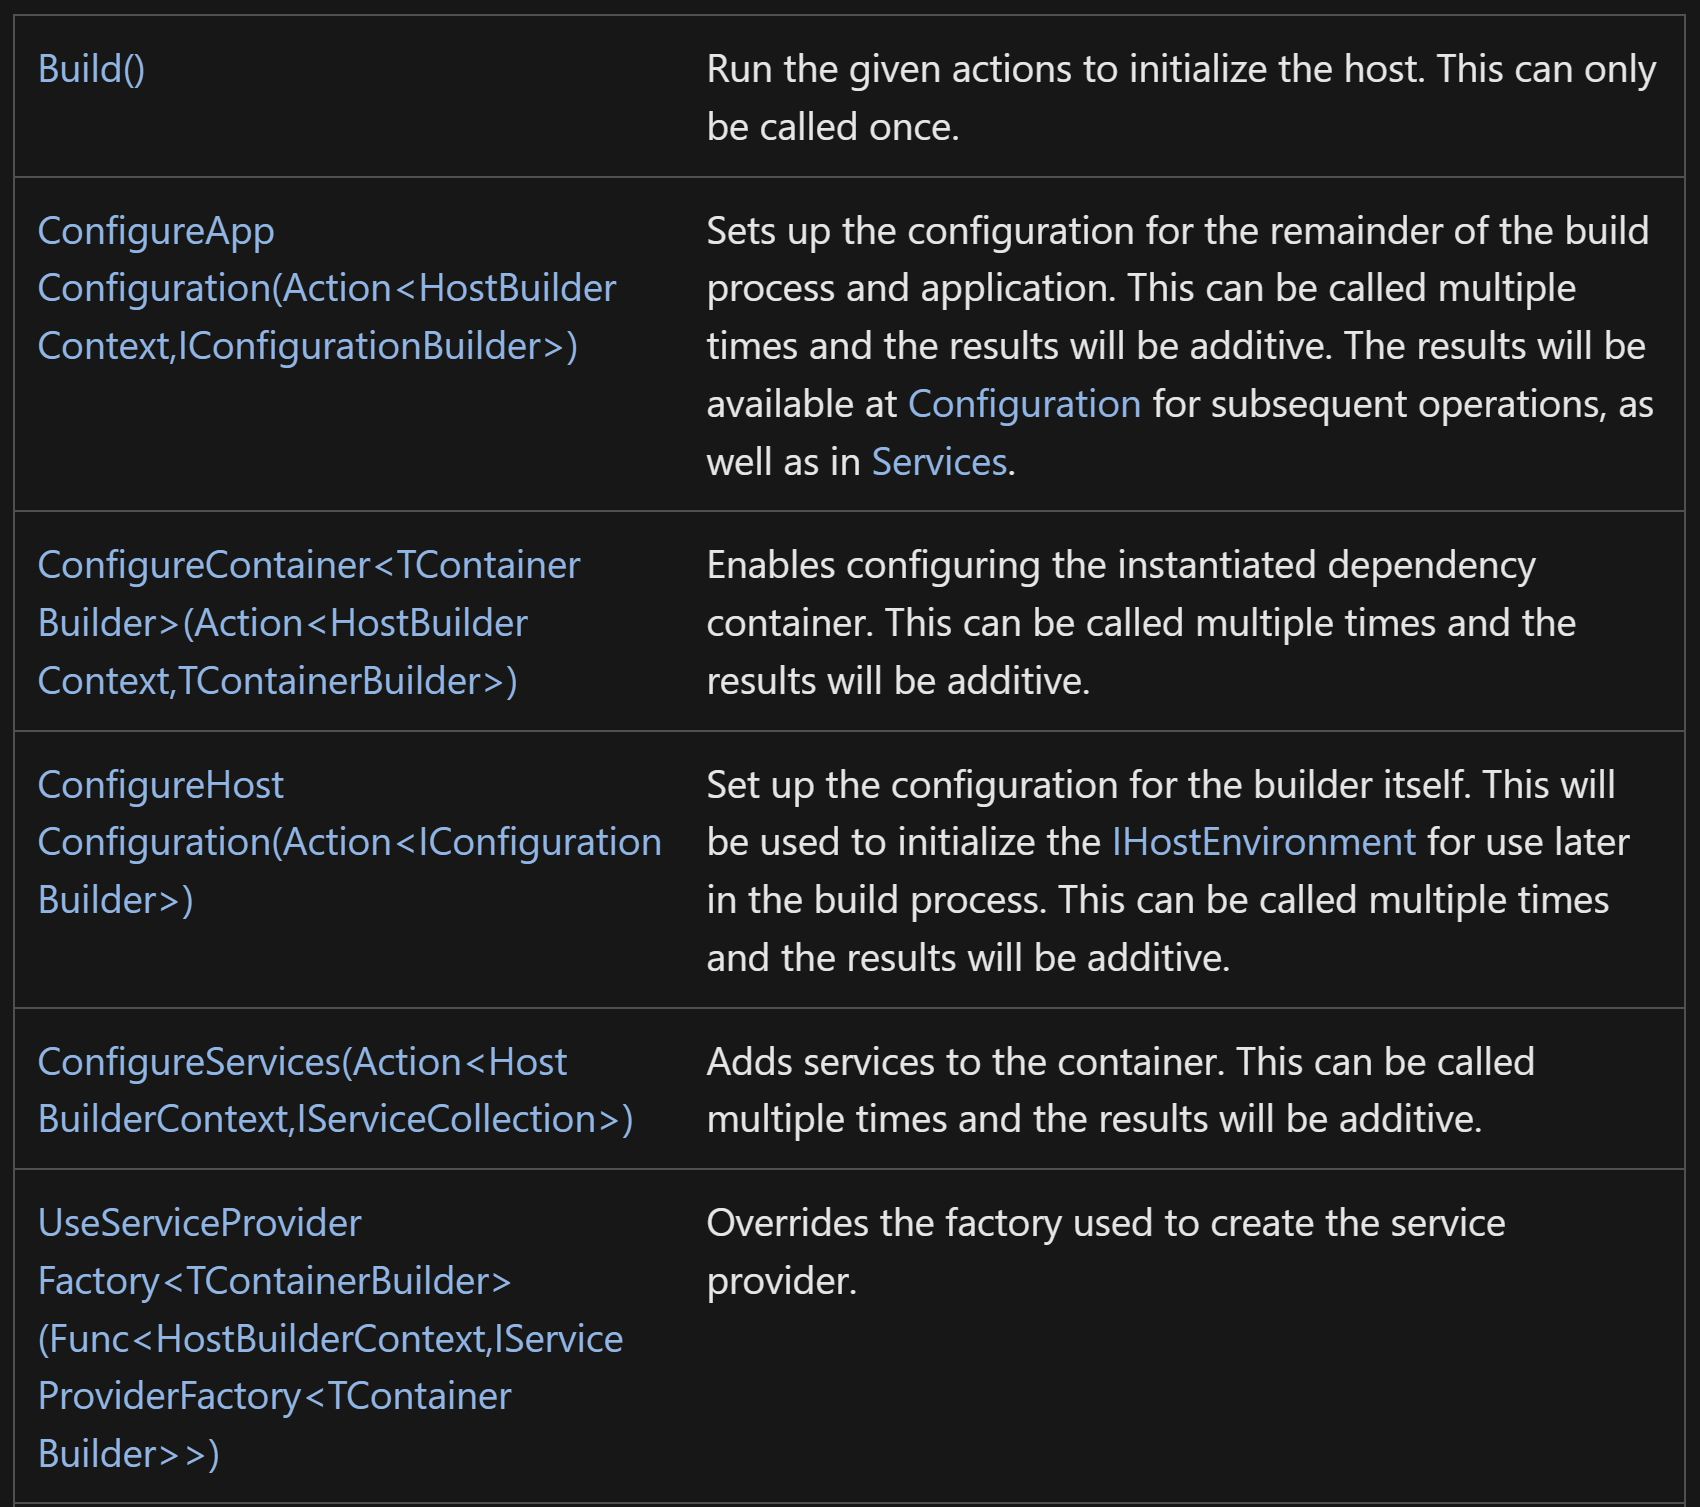
Action<T> is a delegate that encapsulates a method that takes a single parameter of type T and returns no value. In the context of IHostBuilder, it is utilized to configure components efficiently. By employing Action<T>, developers can pass methods as parameters, enabling the dynamic configuration of components within your application.
How to use this in your own code
By structuring your components to accept configurations via Action<T>, you can create flexible and easily configurable building blocks for your application. Let’s demonstrate this with a very simple example; in this case some dummy middleware that must be configured during startuo of your application
Step 1: Define your component
Start by designing your components with configurable properties or behaviors. Identify the parameters that users might want to modify to suit their specific requirements. In our example this is just a message we want to write to the console.
public class CustomMiddlewareOptions
{
	public string Message { get; set; } = string.Empty;
}

public class CustomMiddleware
{
	private readonly RequestDelegate _next;
	private readonly CustomMiddlewareOptions _options;

	public CustomMiddleware(RequestDelegate next, CustomMiddlewareOptions options)
	{
		_next = next;
		_options = options;
	}

	public async Task Invoke(HttpContext httpContext)
	{
		Console.WriteLine($"Middleware says: {_options.Message}");
		await _next(httpContext);
	}

}
Step 2: Add an extension method to register the component
Add Action<T> as a parameter in the extnsion method. This action will allow users to provide their custom configurations during the component’s initialization.
public static class ServiceConfigurationExtensions
{
    public static IApplicationBuilder UseCustomMiddleware(
		this IApplicationBuilder appBuilder, Action<CustomMiddlewareOptions> options)
    {
        var configuration = new CustomMiddlewareOptions();
        options(configuration);
        appBuilder.UseMiddleware<CustomMiddleware>(configuration);
        return appBuilder;
    }
}
Step 3: Configure your component
In this step we will register and configure our component. As you can see this code
var builder = WebApplication.CreateBuilder(args);
var app = builder.Build();

app.UseCustomMiddleware(options => options.Message = "Hi !!");

app.MapGet("/", () => "Hello World!");

app.Run();
Run the application
When you run the application you will see that the configured message is written to the console.

Conclusion
In this blog post, we’ve examined the role of Action<T> in configuring components.By structuring your code in this manner, you provide users with the flexibility to customize the behavior of your component through configuration while adhering to the familiar patterns of ASP.NET Core application setup. This approach not only promotes consistency within your codebase but also ensures that your components are easily integrable into existing projects.
Happy coding!